Yesterday I had a few minutes to sew up a couple of masks and decided to grab a few photos to show how I sew the pattern. Tom’s videos found at the link above are even better, but this series of photos gives you a quick view of the steps.
After cutting out the pattern (two pieces), attach the elastic (or in my case, Spandex strips, stretched so that they curl, cut 1/2” wide) to the right side of the fabric. I didn’t mark anything on the fabric. I just lined it up with the paper pattern to eyeball the placement.
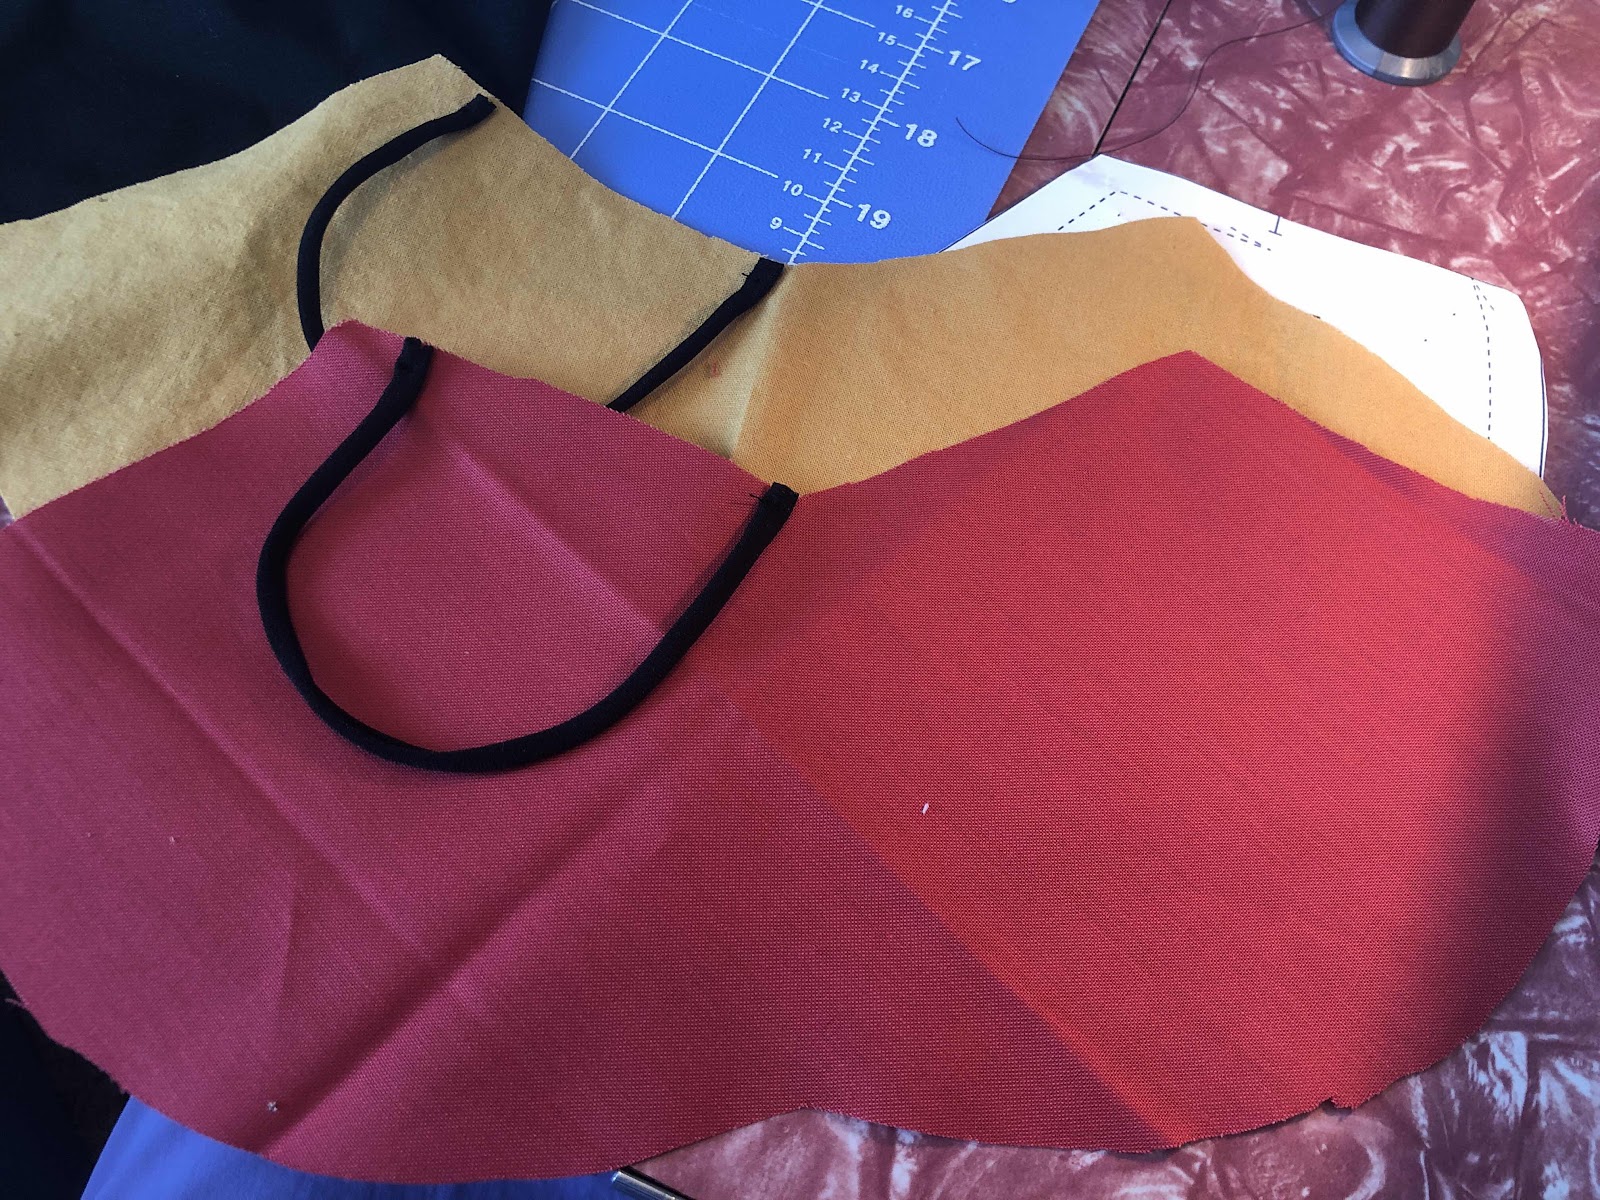 |
| Note: These sides are the right sides of the fabric. Have your ear loops tacked down so that the loops sit on top of the fabric. |
Next, turn the right sides together and stitch the bottom curved edge all the way across. Note that the elastic is sandwiched in between the two layers of fabric. Be careful to not catch the elastic straps in your seams!

For the next step, fold the fabric side to side, bringing it together, and stitch a short seam, capturing the elastic ends but leaving a small opening in the fabric so that you can turn the right sides out.
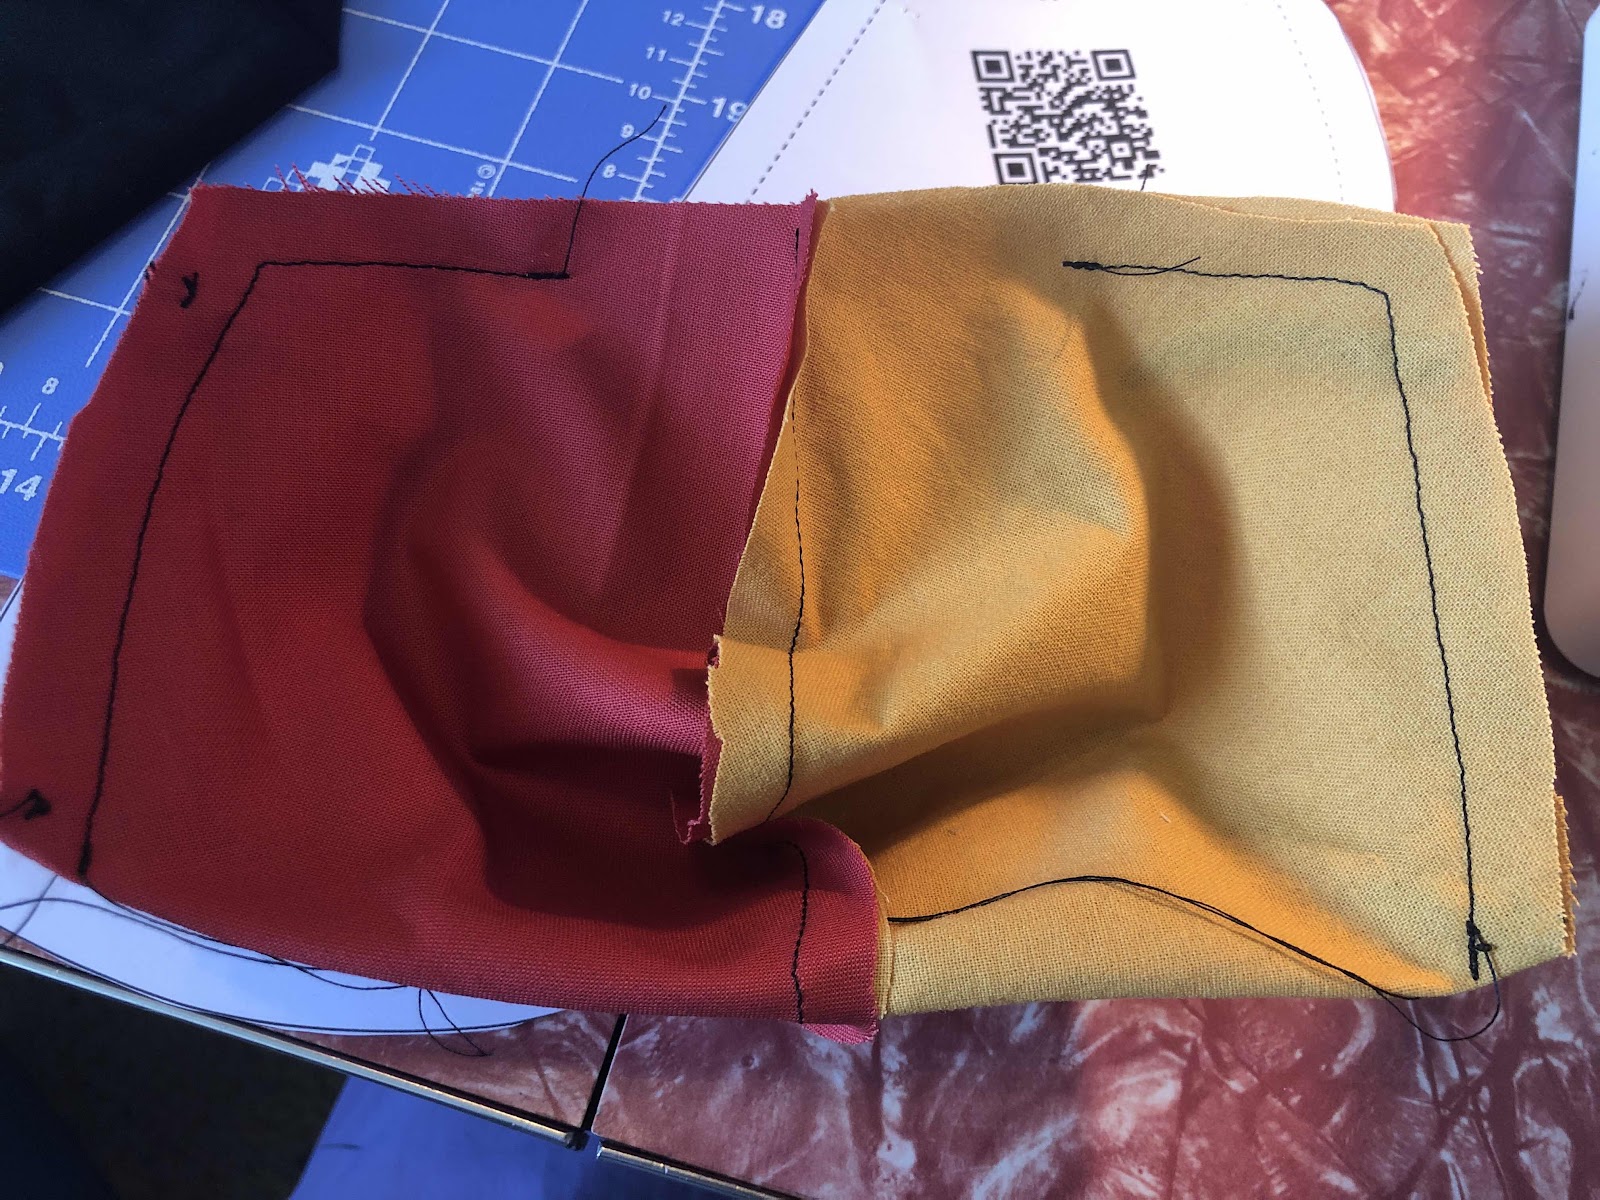 |
| This is the weird step that threw me for a second. Bring the sides over to sew so that the seam you just sewed is in the middle. |
You can see now that the two colors are going to be split down the center of the mask. My 20-year-old loves all things Iron Man, so I did my best to match his colors.
All that remains after that is to turn the mask right side out, get the corners pushed out, and close up the hole. Yes, you could trim the seams a bit, but I didn’t worry about it. It is not a dress or shirt I’m sewing, after all. I’m trying to keep speed up on these things. Sew a top-stitched seam along the top edge of the mask to close up the hole. Voila! Finis!

The size I sewed for my son is the large one. Standing 6’8”, he’s a tall fellow and has a rather large head. It fit him very comfortably.
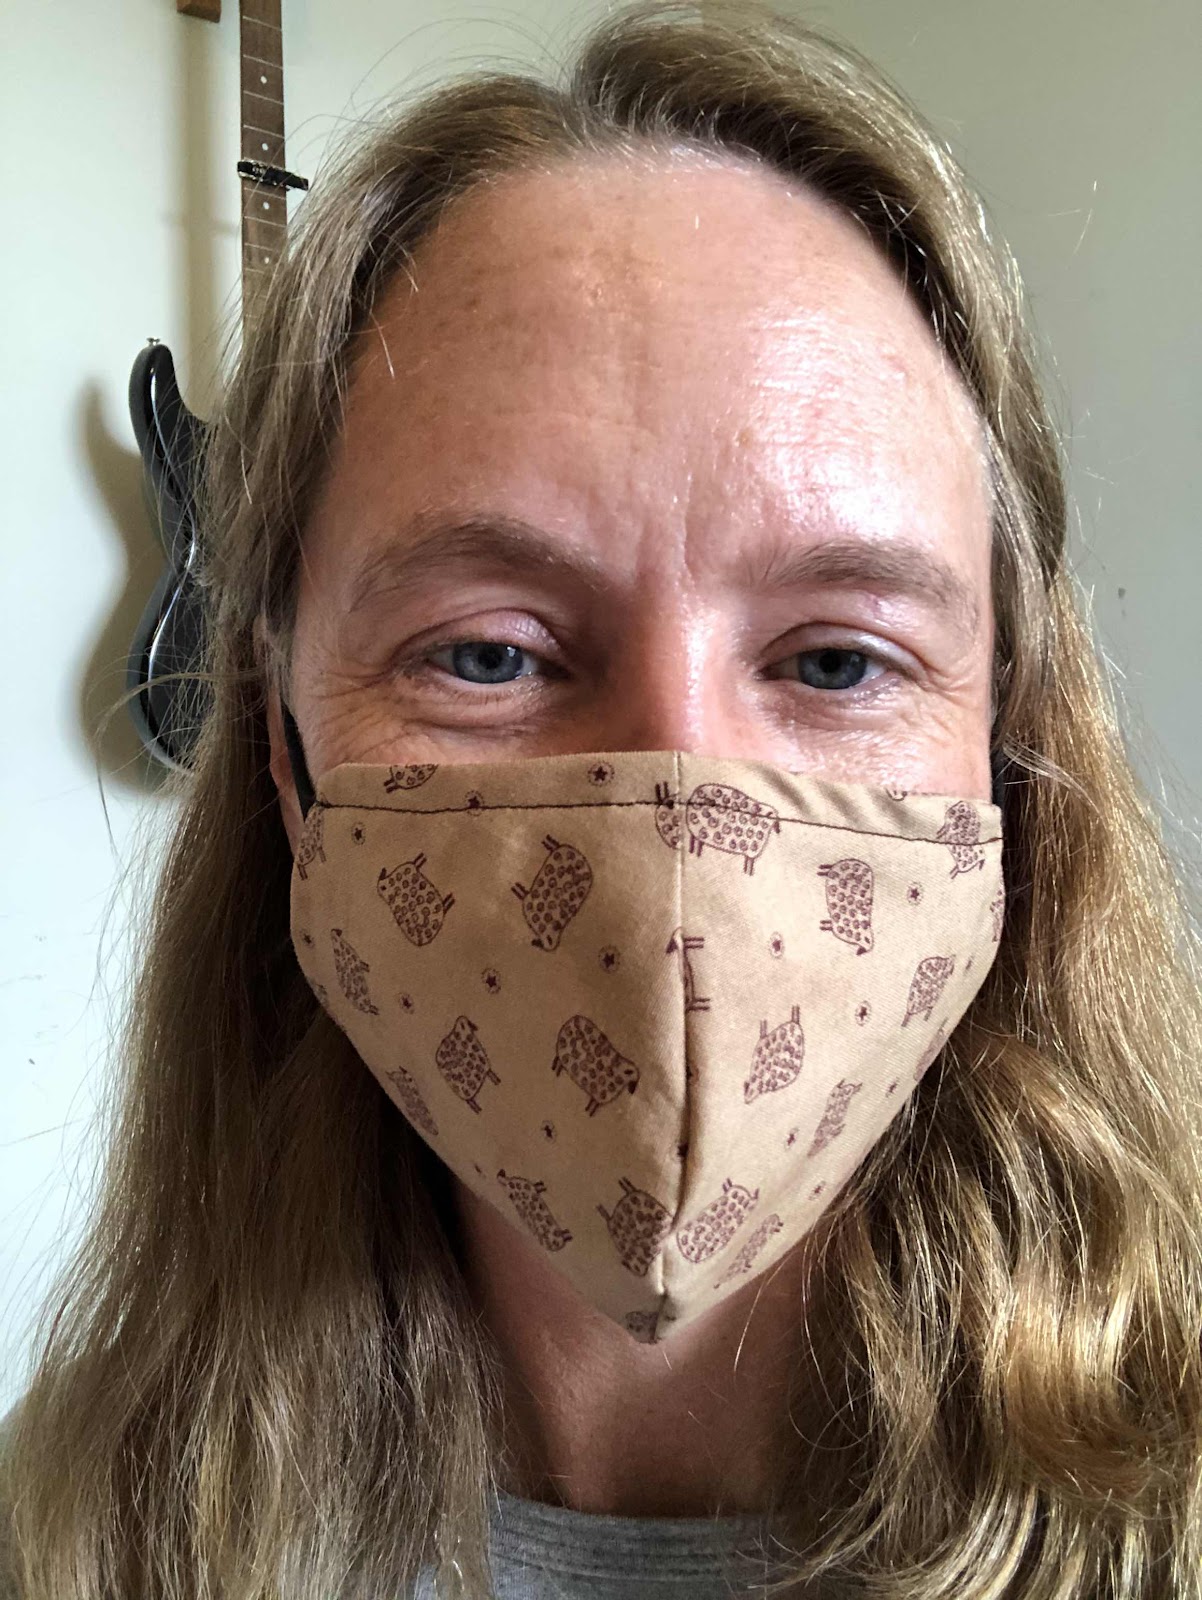
I also sewed a mask for myself (regular size, V1), pictured below:
While I never would have imagined myself sewing masks in 2020, I have decided to embrace my creative side and pick some unique fabrics. Might as well enjoy what you wear, right? Here are just a few more of the masks I've completed.


My daughter is heading off to university at the beginning of August and will be required to wear a mask pretty much everywhere except in her dorm room, so needless to say, I’ll continue to be sewing these for quite some time. I am grateful to Tom for sharing his pattern with the world.